
This article opens our series of guides to VHS capture and restoration. We begin with the cassette and follow its picture and sound all the way to a file on the computer. Along the way, we share practical experience from the studio: what helps a video recorder read a tape well, where problems tend to arise and which choices make a lasting difference to the result.
The guide is for anyone considering a home transfer or choosing a professional service. We introduce technical terms as they become useful, so there is no need for specialist knowledge at the outset. Our focus is PAL, the television standard used in Poland and much of Europe, with NTSC differences explained where they matter. The equipment named below illustrates the different jobs in a capture chain: the route a recording takes from the tape to the computer.
Later articles will cover restoration in AviSynth and compare it with other tools. First, though, we need a faithful starting point: a carefully checked digital recording, which we will call the master. Getting the capture right gives us more to work with when restoration begins.
We also draw on the work of experienced contributors to specialist video forums. LordSmurf, a DigitalFAQ staff member, has spent years publishing capture guidance, including a detailed VCR buying guide. Sanlyn, a longstanding contributor to DigitalFAQ and VideoHelp, wrote the VirtualDub capture guide referenced here. jagabo, a longstanding VideoHelp contributor, uses explanations of S-Video and composite picture faults to explain how video signals behave. Their detailed explanations and practical examples make these discussions valuable references. We read them alongside manufacturers' documentation and guidance from preservation institutions.
1. The tape comes first
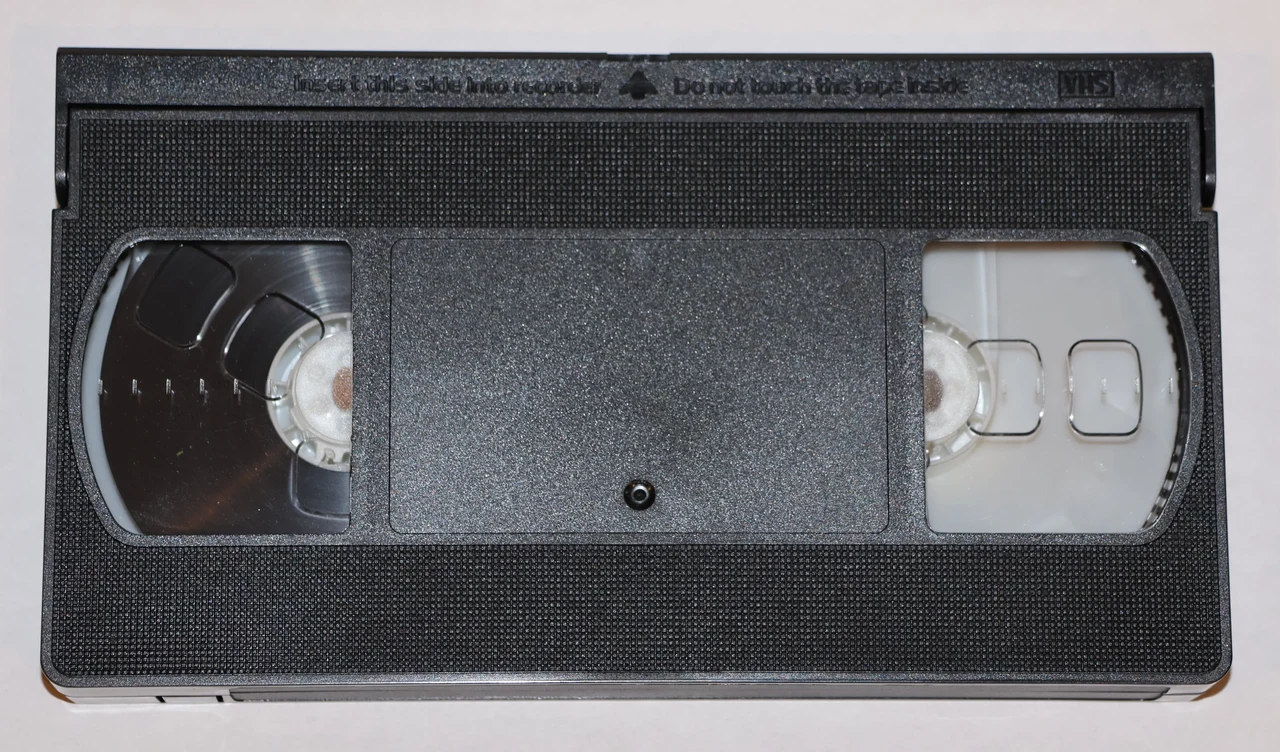
Before we consider picture quality, the cassette needs to be safe to play. Its label, recording standard, shell and any visible tape provide the first clues about what the transfer will involve.
Mould, damaged tape edges or a cassette mechanism that does not move freely call for assessment before playback. The Library of Congress guidance on handling recordings is a useful starting point for looking after these materials. An irreplaceable family recording is a poor choice of test tape for an unfamiliar machine.
VHS tapes have no single, predictable expiry date. Their materials, storage conditions and handling histories differ; heat, damp and contamination can accelerate deterioration. The US National Archives' advice on magnetic media explains why storage matters. Irreplaceable recordings and cassettes whose condition is uncertain deserve priority. There is another reason to act: reliable playback depends on ageing equipment and specialist repair skills.
The digital file will need care too. Copies checked for integrity and kept on separate storage devices protect the transfer. A single USB stick, however convenient, is not a backup plan.
2. Finding a deck that reads the recording well
A playable tape still needs a machine that can read it properly. The recorder, often called a deck, supplies the signal to every device that follows. Its tracking system, heads, tape transport and electronics all affect that signal. Restoration software cannot bring back detail that was never read from the tape.
A serviced S-VHS deck with a time-base corrector (TBC) and adjustable picture processing is a sensible starting point for conventional capture. The TBC helps steady the picture; we will return to its role shortly. LordSmurf's VCR buying guide helps narrow the search to suitable model ranges. The tape itself still has the final say: the most expensive deck may not track a particular recording best, and a respected model number is no guarantee that an individual machine is in good condition.
Useful PAL examples include the Panasonic NV-HS1000, NV-HS950, NV-FS200, NV-HS860, NV-HS930 and NV-HS960, alongside suitable variants of the JVC HR-S9600, HR-S7600, HR-S7700/7711/7722, HR-S7950/7955EK and HR-S7960/7965EK. The appendix at the end of this article provides a broader list of JVC and Panasonic S-VHS decks, arranged by release year and showing whether each model has a TBC.
The most useful comparison is between two decks playing the same difficult passage. Tracking streaks, bending vertical edges, smeared textures in moving objects and unstable Hi-Fi sound reveal different weaknesses. A still image cannot show all of them.
Before buying, it is worth checking the complete model number, including its regional suffix, along with service history, supported tape speeds, outputs, audio tracks and TBC operation. “NTSC playback” on a PAL deck may mean a hybrid output that the capture card cannot accept. DigitalFAQ users describe problems capturing NTSC tapes with PAL recorders. It is worth establishing exactly which signal the deck supplies at its output.

3. Getting the picture out: VHS, S-VHS and S-Video
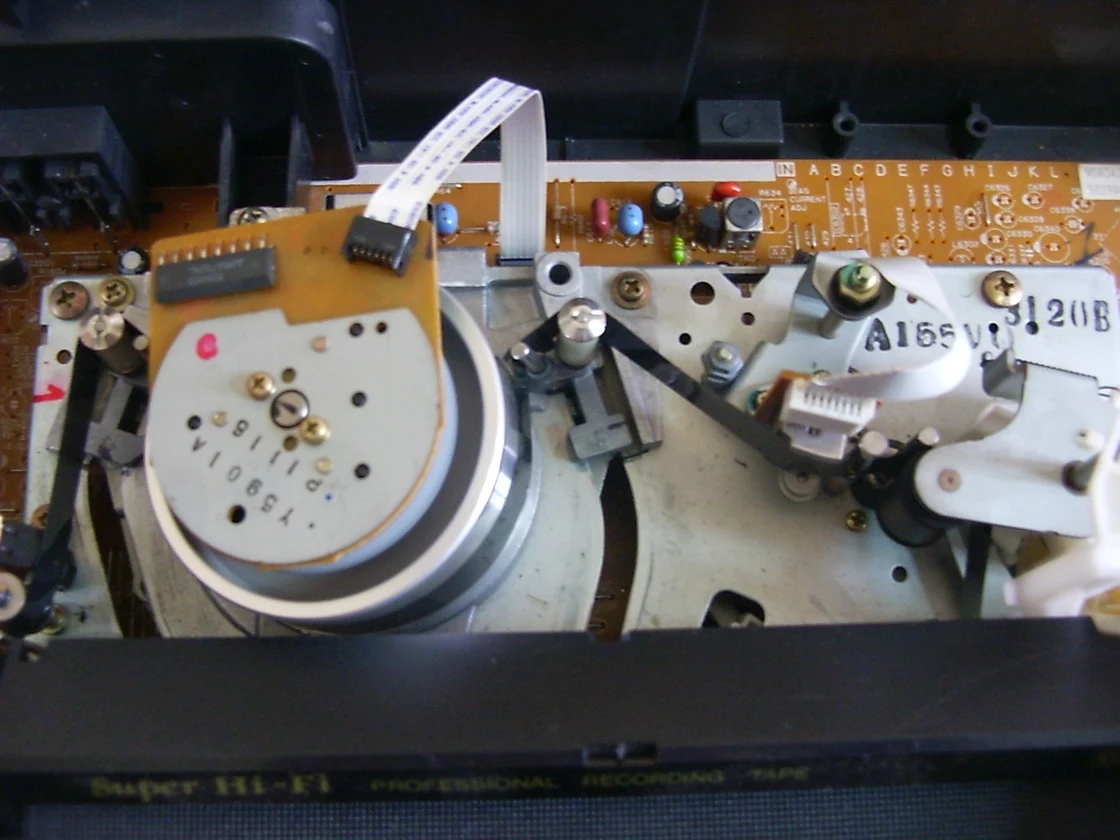
Once a deck reads the tape well, the next question is how to carry its picture to the capture equipment. Similar names can cause confusion here: VHS and S-VHS are recording formats; S-Video is a connection.
S-VHS records finer detail than VHS. The Canadian Conservation Institute's comparison of recording formats gives approximately 400 lines of horizontal resolution for S-VHS and 240 for VHS. These figures describe how much fine detail the formats can resolve across the picture, not its height in digital pixels. They do not make VHS a 240p format: the PAL or NTSC timing remains unchanged.
The playback features of a good S-VHS deck can also benefit ordinary VHS tapes, although they cannot turn a VHS recording into S-VHS. A tape recorded in S-VHS needs proper S-VHS playback; the S-VHS quasi-playback offered by some VHS machines limits the picture to VHS resolution.
S-Video keeps the brightness and colour signals separate. Composite combines them, leaving the next device to separate them again. Where the equipment has suitable sockets, S-Video is usually the first connection to try; composite remains appropriate when the source requires it. In their discussion of S-Video and composite, Sanlyn and jagabo explain how keeping brightness and colour separate can reduce visible interference. S-Video carries no sound, so the red and white audio outputs need a separate connection.
Secure connectors, sensible cable lengths and proper shielding matter more than an expensive brand name. Bent pins or a loose adapter can create faults that appear to come from the capture card. If interference changes when a lead moves, trying a known-good cable is a useful first check. The DigitalFAQ discussion of preparation and cabling discusses cable quality, faults and the limits of judging a lead by its price.

4. Making an unsteady signal recordable
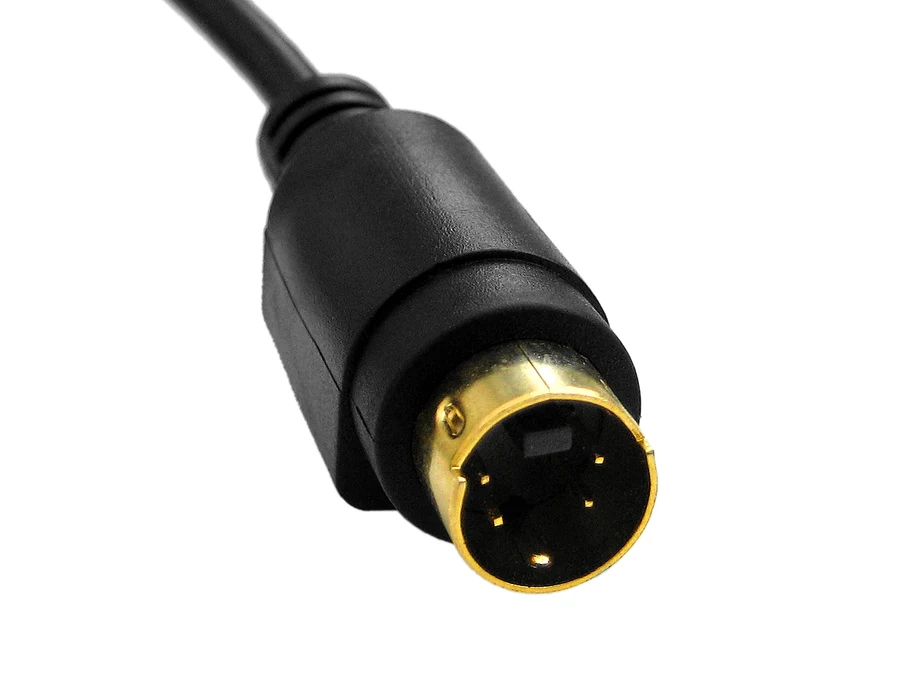
A reliable connection gets the signal from one device to the next, but it cannot steady the timing of the recording itself. During VHS playback, small timing errors can make straight edges wobble or pull the top of the picture sideways. Time-base correction addresses this instability, with different devices handling different parts of the problem.
| Function | What it helps with | What can remain |
|---|---|---|
| Line or multi-line correction built into a deck | Horizontal waviness within the picture | Irregular timing between frames |
| External frame synchronisation/TBC | Irregular timing between frames | Distortion within individual lines |
| Quasi-TBC in selected DVD recorders | Difficult tearing and horizontal timing faults | Processing changes and limits compared with a dedicated full-frame TBC |
Some devices combine these functions. None can repair a worn tape transport or reconstruct a missing signal, and an apparently steady output may still contain repeated frames. LordSmurf's guide to time-base correction explains how these functions differ. Checking motion in the captured file is therefore as important as reading the specifications.
Only selected DVD-recorder models provide useful correction when the signal passes through them without being recorded to disc. This arrangement is called passthrough. Tested versions of the Panasonic DMR-ES10, ES15 and EH52 are examples. Their behaviour depends on the chipset that processes the video, and the operating instructions often do not identify it as a separate TBC feature. The chipset comparisons and capture tests on VideoHelp show why the exact model and regional version matter.
This is quasi-TBC, or TBC-like correction, rather than a substitute for a dedicated full-frame TBC. It can straighten distorted lines and reduce tearing, but it may also change picture levels or introduce processing artefacts. LordSmurf explains these limitations in the DVD-recorder section of that guide. Comparing a difficult passage with the deck's TBC switched on and off helps establish which combination works better. An extra processing stage earns its place only if it improves the result.
The Datavideo TBC-1000 and AVT-8710, also covered in that guide, are examples of dedicated external full-frame correctors. Their job is to supply the capture equipment with a signal whose timing is stable. When buying one, its age, hardware revision, supported television standard and performance in an actual capture all need checking.
5. Keeping detail in bright and dark areas
With timing under control, the next concern is preserving detail in the brightest and darkest parts of the picture. A wedding dress can become a plain white patch, while a dark room can lose all its shadow detail. A proc amp, short for processing amplifier, allows brightness, contrast and colour to be adjusted before capture when necessary.
The key is finding where detail disappears. If a device clips the highlights, meaning that different bright tones are all recorded at the same limit, lowering brightness afterwards only darkens a featureless patch. Any correction needs to come before that loss. A flat-looking preview, on the other hand, may simply be displaying the signal incorrectly. The recorded data and video measurement tools provide a firmer basis for adjustment than the preview alone.
Older models discussed for this work include the SignVideo PA-100/Studio 1 and Elite Video BVP-4/BVP-4 Plus. Their exact versions and behaviour with PAL need verification: the DigitalFAQ discussion of proc amps and compatibility contains conflicting reports. A model name alone is not enough to make a confident choice.
We begin with neutral settings, then make one adjustment at a time to address a specific problem. The discussion of processor choices on DigitalFAQ helps put those choices in context. If the capture chain already preserves the detail in bright and dark areas, another processor may offer little benefit. Colour correction from scene to scene can wait until there is a master to work from.
6. Choosing a capture card or device
The picture is now ready to enter the computer. A capture card or external capture device converts the analogue video signal into digital samples: numbers representing the picture. Choosing one usually means comparing inexpensive USB grabbers, older analogue capture cards and modern video capture devices. What matters most is how they handle VHS in practice.
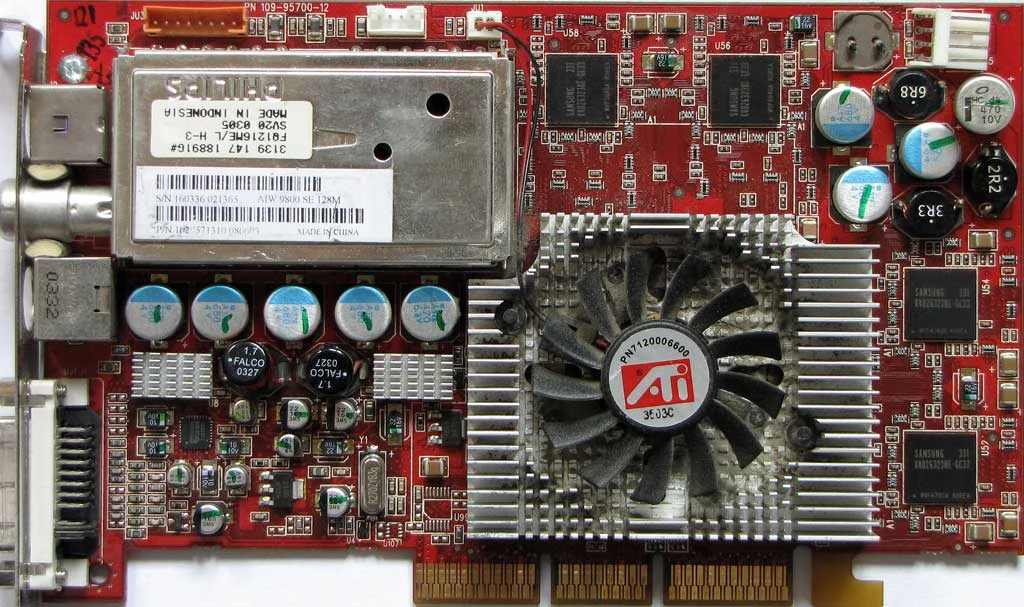
Older ATI All-in-Wonder cards remain worth considering for dedicated capture computers, often called capture workstations. The ATI All-in-Wonder Radeon 8500DV is one example. It belongs to the All-in-Wonder family; TV Wonder is a different range. Despite the DV suffix, this card does not require analogue recordings to be encoded as DV.
These cards offer a well-documented route to analogue capture, provided the computer is compatible. In his advice on choosing older ATI cards, LordSmurf stresses the need for the correct connection leads, drivers and separate audio hardware. A card sold without its proprietary breakout lead, which provides its external sockets, may be much less useful than it looks. Once everything is connected, a complete test recording is the best way to check that motion, sound and picture levels survive the transfer.
Cheap USB grabbers look convenient, but a pleasing preview can conceal clipped shadows or altered colours. LordSmurf points to these faults in the Easycap/EZcap samples discussed on DigitalFAQ. The lesson is to judge the device and its recorded files: USB itself is not the problem. A known model with tested capture modes is a different proposition from an anonymous adapter whose internal components may vary between batches.
Blackmagic Intensity Pro illustrates why a modern capture card needs testing with the signal a VHS deck actually supplies. In the VideoHelp discussion of Intensity Pro, users report black frames and audio interruptions with difficult analogue input, as well as successful capture from a stable HDMI feed. These are different capture arrangements. Support for HD or 4K says little about a device's tolerance of unstable VHS timing, and findings about one Intensity model cannot be applied to every Blackmagic product.
For a dedicated VHS setup, a compatible, tested ATI configuration is therefore worth serious consideration. That brings us to the next part of the system: a computer that can run the chosen card reliably.
7. Why older computers still have a role in VHS capture
A good capture card needs compatible drivers and software. For some older cards, the most dependable combination still runs on the operating system they were designed for, including Windows XP. This is why carefully configured older computers remain useful as dedicated capture workstations.
The advantage lies in compatibility and a thoroughly tested setup. Windows XP does not improve the picture by virtue of its age; a modern computer with a suitable, tested capture device can also produce a good master. As the ATI setup discussion on DigitalFAQ illustrates, the card, cabling and software need to work together.
Long recordings expose problems that a brief preview can miss, such as interruptions when writing to disk or storage that cannot accommodate large files. Documenting the setup and testing it over a full recording make these computers dependable tools for capture.
Microsoft has ended support for Windows XP, so capture computers running XP are best kept offline. Work that requires internet access can be handled on computers with supported operating systems.
8. Following the sound alongside the picture
So far, we have followed the picture into the computer. Sound accompanies it on the tape but may take a different route during capture. Checking that route helps prevent a good picture from being spoiled by a buzz, a missing audio channel or sound that gradually slips out of sync.
In older ATI setups, separate hardware digitises the picture and sound. The sound card needs a clean line-level input, suitable recording-level controls and dependable drivers. These are the qualities behind the DigitalFAQ recommendation of Turtle Beach Santa Cruz: LordSmurf compares recording quality and distortion with other cards, rather than concentrating on gaming effects or playback features. It is a useful option for compatible older computers, although other capture setups may handle sound differently.
In a setup using these example devices, the audio route is VCR → selected DVD recorder, such as a Panasonic DMR-ES10/ES15/EH52 → ATI All-in-Wonder Radeon 8500DV → Turtle Beach Santa Cruz → capture software. The ATI card's audio connections pass the sound to the sound card, which digitises it. The leads and inputs required depend on the hardware version. Listening to both channels, and comparing the deck's Hi-Fi and linear audio tracks where available, can reveal noise when the deck switches between tracks or brief losses of sound.
48 kHz, 16-bit PCM is a practical starting point for older capture hardware that supports it correctly. PCM stores the audio samples without lossy compression. Genuine 24-bit capture allows more conservative recording levels before quantisation noise, introduced by rounding sample values, becomes a concern. Simply padding 16-bit samples to 24 bits adds no information, and neither format prevents clipping at the input. The IASA video-preservation guidance on audio digitisation (PDF, p. 40) describes the 48 kHz/24-bit PCM approach used in archival work.
Video processing can introduce a fixed delay between picture and sound. Separate clocks in the video and audio hardware can instead cause synchronisation to drift over time. The VirtualDub developer's explanation of capture timing helps distinguish these problems. Speech, or a visible event with a sharp sound, provides useful checkpoints near the beginning, middle and end of a recording. Noise reduction and other sound restoration can wait until a working copy is available.
9. Saving a lossless master
Once picture and sound reach the computer, the master file needs to preserve what was captured. HuffYUV and Lagarith are lossless video codecs: they compress the data without discarding the samples they receive. The word “lossless” describes this compression step. It cannot guarantee a perfect analogue conversion or undo detail lost earlier in the chain.
HuffYUV is a practical choice for many older capture computers. In his DigitalFAQ explanation of capture codecs, Sanlyn describes using it for real-time YUY2 capture and Lagarith for later processing. The Lagarith developer's documentation explains that codec's supported formats and compression options. Both need testing during an actual capture, using the intended pixel format, which determines how the picture samples are arranged. A colour conversion before lossless compression can still change the data.
A useful starting point for PAL is 720 × 576 pixels, 25 interlaced frames per second, YUY2 4:2:2. Each interlaced frame contains two fields, carrying alternate lines of the picture. Preserving all 50 field intervals per second keeps the timing of the source intact. YUY2 4:2:2 describes how brightness and colour samples are stored. Sanlyn's capture settings guide walks through these choices.
It is also necessary to establish which field comes first. Deinterlacing, which converts fields into complete progressive frames, can wait until after capture. The pixel aspect ratio needs to be interpreted correctly too: displaying the stored 720 × 576 picture as square pixels gives the wrong proportions.
Uncompressed 8-bit 4:2:2 PAL video takes approximately 74.6 GB per hour, calculated as 720 × 576 × 2 bytes × 25 × 3,600. File sizes with HuffYUV and Lagarith depend on the content; noisy footage compresses less efficiently. Audio, working copies and backups also need space.
FFV1 video in a Matroska file is another preservation option, discussed in the Library of Congress format guidance. An existing master can be converted to this format, provided checks confirm that its pixel format, timing and decoded samples remain unchanged. AVI, MKV and MP4 are file containers: they hold the video and audio streams, but their names alone do not tell us whether the video is lossless.
10. Where DV fits
DV deserves a separate explanation because it may be the format of the original recording or an additional conversion made during capture. In the first case, a transfer can preserve the existing digital recording. In the second, it compresses a VHS source that was originally analogue. The Library of Congress description of DV encoding provides the technical background.
Consumer DV25 uses 4:1:1 chroma sampling for NTSC and 4:2:0 for PAL, as explained in Adam Wilt's technical DV guide. These numbers describe how colour information is sampled in relation to brightness. Both arrangements differ from a lossless 4:2:2 master, but they do not affect the picture in exactly the same way. The colour detail present in the source and the processing that follows both matter, so a fixed percentage of “lost colour” would be misleading. Other formats in the DV family have different specifications.
For VHS recordings that will undergo substantial restoration, we favour a properly captured lossless master over an intermediate DV file. An existing DV transfer is still worth preserving. Converting it to a lossless codec avoids further losses from compression, although it cannot undo those from the original conversion.
For MiniDV recorded as DV, transferring the original digital stream, where possible, preserves the recording directly. Playing it through an analogue output and digitising it again adds an unnecessary conversion.
11. Recording with VirtualDub and its alternatives
The capture program brings the video card or device, picture format, codec and audio source together. Its first job is to record reliably with the chosen hardware. This is another part of the process where an older tool can still be the right one.
32-bit VirtualDub 1.9.11 is a sensible starting point for older capture computers. Sanlyn recommends this version in his software advice. This recommendation concerns compatibility. It does not establish that every later release damages recordings.
In a Doom9 reply about Capture AVI, VirtualDub2 developer shekh explains that its Capture AVI functionality is largely shared with VirtualDub. Individual versions still need testing with the intended device. AmaRecTV offers another option. A sustained recording test with the intended hardware is the best basis for choosing between them.
Sanlyn's settings guide, introduced earlier, brings these choices together: the television standard, picture format, codec, audio source and timing settings. Counters for dropped and inserted frames help flag problems. However, zero reported drops cannot rule out repeated frames or faults introduced before the signal reached the program. The VideoHelp discussion of AmaRecTV logs helps explain how to interpret those counters. Automatically removing duplicate frames can change the recording's duration and disturb audio synchronisation.
Editing and streaming applications may apply scaling, deinterlacing, colour conversion or lossy encoding by default. The recorded file needs checking to establish whether such a program is suitable for capture. We will return to Premiere Pro, AviSynth and Topaz when discussing restoration, once there is a reliable master to work from.
12. Seeing the complete capture chain
With each part in place, it is easier to see how the whole system works. The example below joins the stages we have discussed, showing where picture and sound take separate paths before meeting in the capture program.
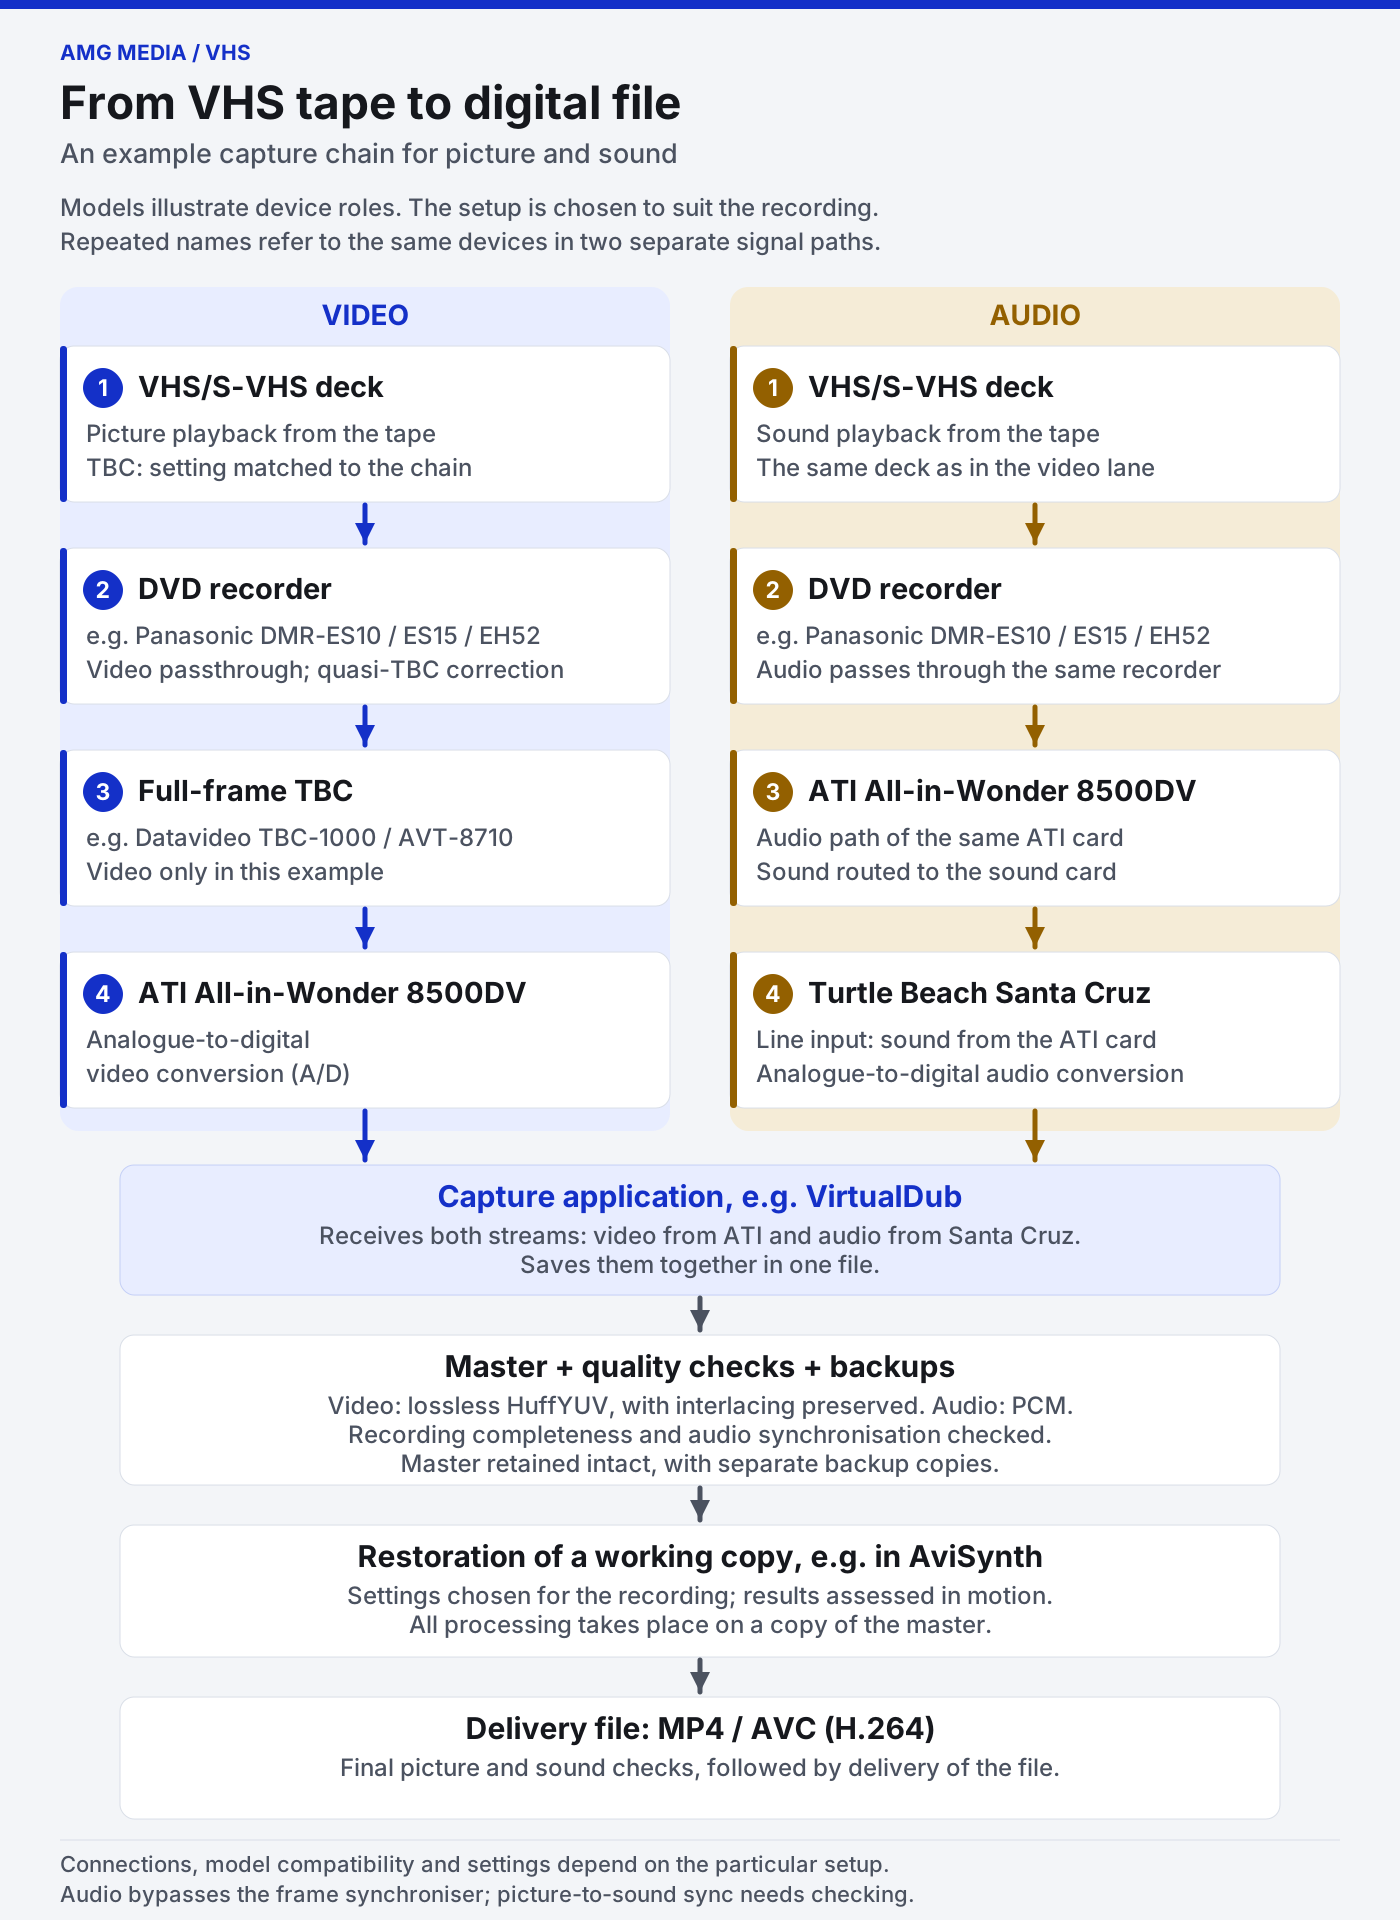
The VCR, DVD recorder and ATI card appear in both routes because the same devices have separate picture and sound connections. Sound bypasses the frame synchroniser and passes through the ATI card's audio connections to the Santa Cruz. The capture program records the video with a lossless codec such as HuffYUV, alongside PCM audio. The final stages of the diagram show how that master becomes the source for a restored viewing copy.
The diagram illustrates the roles of the devices; a particular tape may call for a different arrangement. When using DVD-recorder passthrough, it is worth comparing playback with the deck's TBC switched on and off. The named recorders do not necessarily behave alike, and their quasi-TBC has a different job from the external full-frame TBC. Synchronisation still needs checking across the complete system. Keeping a record of the connections, inputs and settings makes later comparisons much easier, especially when tracing where detail was lost.
13. Checking the master before restoration
The completed file gives us the first chance to judge the transfer from beginning to end. Checking it now can catch faults before they pass into every restored version, and while the tape and equipment are still at hand.
For an 8-bit video-range signal, luma, the component representing picture brightness, nominally falls between 16 and 235. This does not mean that everything outside those values should be discarded during capture. The IASA guidance on video signal ranges (PDF, p. 16) explains the technical context. It helps to distinguish three things: what the device actually recorded, where any hard clipping occurred, and how the preview displays the saved data. If useful detail remains outside the nominal range, preserving it leaves room for an informed adjustment when preparing the viewing copy.
We suggest checking six things before moving on:
- Motion: viewing one field at a time, or using a correctly deinterlaced test copy, helps reveal missing movement, repeated frames and reversed field order.
- Timing: capture logs and checks around tape starts, edits and signal breaks help locate interruptions.
- Picture levels: bright and dark scenes reveal lost highlight detail, crushed shadows and unwanted changes in brightness.
- Sound: both channels need checking, along with synchronisation at several points, including near the end.
- Completeness: the expected recording should be present and decode successfully from beginning to end.
- Documentation and backups: a record of the source and capture settings belongs with the master. Checksums, which act as digital fingerprints, help verify that copies are identical before working files are deleted.
If a check reveals a problem, the next step is to trace it to the relevant part of the capture chain. Finding that stage before changing several settings at once makes a second capture more likely to solve it.
14. Another route: RF capture and VHS-Decode
The route described so far begins with a picture that the deck has already decoded. RF capture takes the radio-frequency signal from an earlier point in the playback electronics, leaving more of the decoding to software. Retaining this raw recording makes it possible to decode it again without another pass through the tape.
The Domesday Duplicator project provides RF capture hardware originally developed for LaserDisc preservation. VHS-Decode is the software that turns suitable RF recordings from tape into video. One captures the signal; the other decodes it.
Reliable tape transport, accurate tracking and a suitable connection inside the deck are still essential. The RF signal used here comes from the playback electronics, not the aerial output. The VHS-Decode workflow guide describes capture options based on CX hardware and MISRC, alongside the single-channel Duplicator. Video RF and Hi-Fi audio RF require separate signal paths. The linear audio track needs a conventional audio capture path, so the required channels and their synchronisation have to be planned together.
The project's documentation and development notes, including updates from April 2026, describe progress with graphical controls, macOS support and export tools. We follow these developments with interest. Useful comparisons rely on the same recording and include checks for artefacts introduced during decoding. Progress in RF capture is worth following, but it need not delay a good conventional transfer. We include RF capture here as an emerging approach; it is not presented as a current AMG Media service.
15. Choosing a route for the archive
All these choices lead towards the same goal: preserving the tape's picture, motion and sound as faithfully as possible. Our priorities are a tape that can be played safely, a suitable serviced deck, a stable signal, dependable capture and a carefully checked master. Additional processing is useful when it solves a problem we can see or measure.
.jpg)
For a substantial archive, building and testing a dedicated capture setup may be a worthwhile part of the project. With a few family cassettes, it makes sense to weigh that investment of time and equipment against a service that can explain its method and show its results. Either way, keeping the master before restoration leaves future choices open.
Our PLN 70 per cassette service includes basic picture correction, basic audio level adjustment and an MP4 file with AVC/H.264 video. At PLN 200 per cassette, the service includes full picture restoration using our tailored AviSynth workflow, together with sound restoration. Prices apply regardless of recording duration, with possible discounts for larger orders. Delivery of a lossless archival master can be discussed separately; the standard viewing file is MP4.
Our before-and-after sample shows what restoration can achieve, while the restoration workflow explains the process. Tape condition and transfer requirements can be discussed using the details in our contact section or by calling +48 505 191 160. We serve customers across Poland, with collection in person near Warsaw by arrangement.
The next articles will explore the choices introduced here in more detail before moving on to restoration. A good capture gives that work the best possible starting point.
JVC and Panasonic S-VHS deck catalogue
This appendix lists 84 JVC and Panasonic S-VHS deck models by release year, with TBC availability shown for each. It offers a broader view of the ranges than the shortlist above. Dates follow the source model list; the exact regional version and the condition of an individual machine still matter when choosing a deck.
Open the complete catalogue: 84 JVC and Panasonic S-VHS decks
A chronological list of Panasonic and JVC S-VHS decks, from oldest to newest. It also includes models combining S-VHS with DV, D-VHS, DVD or a hard disk. Release years follow the source model list; launches in individual markets may have differed.
| Release year | Brand | Model | TBC |
|---|---|---|---|
| 1988 | JVC | HR-S5000 | No |
| 1988 | Panasonic | NV-FS1 | No |
| 1989 | JVC | BR-S811E | No |
| 1989 | Panasonic | NV-FS100 | No |
| 1990 | JVC | HR-S5500 | No |
| 1990 | Panasonic | NV-FS90 | No |
| 1991 | JVC | HR-S4700 | No |
| 1991 | JVC | HR-S5800 | No |
| 1991 | JVC | HR-S9000 | No |
| 1991 | Panasonic | NV-V8000 | Yes |
| 1992 | JVC | BR-S622E | Yes* |
| 1992 | JVC | BR-S822E | Yes* |
| 1992 | JVC | HR-S6800 | No |
| 1992 | Panasonic | NV-FS200 | Yes |
| 1992 | Panasonic | NV-FS88 | No |
| 1993 | JVC | BR-S522E | Yes* |
| 1993 | JVC | BR-S525E | Yes |
| 1994 | JVC | HR-S5900 | No |
| 1994 | JVC | HR-S6900 | No |
| 1994 | Panasonic | NV-HS1000 | Yes |
| 1994 | Panasonic | NV-HS800 | No |
| 1995 | JVC | HR-S7000 | No |
| 1995 | JVC | HR-S9200 | No |
| 1996 | Panasonic | NV-HS900 | No |
| 1997 | JVC | HR-S9400 | No |
| 1997 | Panasonic | NV-HS950 | Yes |
| 1998 | JVC | HR-S7500 | No |
| 1998 | JVC | HR-S8500 | Yes |
| 1998 | JVC | HR-S9500 | Yes |
| 1999 | JVC | HR-DVS1 | Yes |
| 1999 | JVC | HR-S6600 | No |
| 1999 | JVC | HR-S6611 | No |
| 1999 | JVC | HR-S7600 | Yes |
| 1999 | JVC | HR-S7611 | Yes |
| 1999 | JVC | HR-S8600 | Yes |
| 1999 | JVC | HR-S9600 | Yes |
| 1999 | Panasonic | NV-HS850 | No |
| 2000 | JVC | HM-DR10000 | Yes |
| 2000 | JVC | HR-DVS2EU | Yes |
| 2000 | JVC | HR-S6700 | No |
| 2000 | JVC | HR-S6711 | No |
| 2000 | JVC | HR-S7700 | Yes |
| 2000 | JVC | HR-S7711 | Yes |
| 2000 | JVC | HR-S7722 | Yes |
| 2000 | JVC | HR-S8700 | Yes |
| 2000 | JVC | HR-S9700 | Yes |
| 2001 | JVC | HM-HDS1 | Yes |
| 2001 | JVC | HR-DVS3 | Yes |
| 2001 | JVC | HR-S6850 | No |
| 2001 | JVC | HR-S6851 | No |
| 2001 | JVC | HR-S6852 | No |
| 2001 | JVC | HR-S6855EK | No |
| 2001 | JVC | HR-S6856EK | No |
| 2001 | JVC | HR-S7850 | No |
| 2001 | JVC | HR-S7851 | No |
| 2001 | JVC | HR-S8850 | Yes |
| 2001 | JVC | HR-S9850 | Yes |
| 2001 | Panasonic | NV-HS820 | No |
| 2001 | Panasonic | NV-HS860 | Yes |
| 2001 | Panasonic | NV-HS870 | No |
| 2001 | Panasonic | NV-HS960 | Yes |
| 2002 | JVC | HR-S5950 | No |
| 2002 | JVC | HR-S5955EK | No |
| 2002 | JVC | HR-S5955MS | No |
| 2002 | JVC | HR-S6950 | No |
| 2002 | JVC | HR-S6953 | No |
| 2002 | JVC | HR-S6955MS | No |
| 2002 | JVC | HR-S7950 | Yes |
| 2002 | JVC | HR-S7955EK | Yes |
| 2002 | JVC | HR-S7955MS | No |
| 2002 | Panasonic | NV-HS825 | No |
| 2002 | Panasonic | NV-HS830 | No |
| 2002 | Panasonic | NV-HS880 | No |
| 2002 | Panasonic | NV-HS930 | Yes |
| 2003 | JVC | HR-S5960 | No |
| 2003 | JVC | HR-S6960 | No |
| 2003 | JVC | HR-S7960 | Yes |
| 2003 | JVC | HR-S7965EK | Yes |
| 2003 | JVC | HR-S8960 | Yes |
| 2003 | JVC | HR-S8965EK | Yes |
| 2003 | JVC | HR-XVS20EU | No |
| 2003 | Panasonic | NV-SV120 EGS | No |
| 2004 | JVC | HR-S5970 | No |
| 2004 | Panasonic | NV-SV121 EGS | Yes |
Yes* means TBC is available with the optional SA-T22E board fitted to BR-S522E, BR-S622E and BR-S822E models. Its presence and condition need checking before purchase. A BR-S822E owner's report on DigitalFAQ describes a fault in the optional SA-T22E.
TBC in the HR-S8965EK is confirmed by JVC's instructions, p. 32. The HR-S9500 entry refers to the E/EH versions documented in the manufacturer's manual, p. 16. Full regional suffixes remain relevant when choosing a deck.
A deck's built-in TBC does not automatically replace an external full-frame corrector.
About the sources
This guide brings together our practical experience, manufacturers' documentation, preservation guidance and discussions on DigitalFAQ, VideoHelp and Doom9. We cite LordSmurf and Sanlyn for their published advice. They are not the authors of this article, and these references do not imply that they endorse our service. Sources checked: 22 September 2026.